Home › Computers › How to Back Up a WordPress Site: A Simple Step-by-Step Guide (2026)
How to Back Up a WordPress Site: A Simple Step-by-Step Guide (2026)
By Taylor Orlando·November 13, 2026
Learning how to back up a WordPress site is one of the most useful things a site owner can do. A backup is a full copy of your site that you can use to bring it back if something goes wrong — a bad update, a hack, a mistake, or a hosting problem. Without one, you could lose months of work in a few minutes.
This guide shows you four ways to back up a WordPress site, step by step. It also covers how to restore a backup, how to test that it works, how often to back up, and the mistakes that catch most people out. The steps are written for self-hosted WordPress sites (WordPress.org). If your site is on WordPress.com, the backup tools work differently — more on that near the end.
A WordPress site can break in ways you do not expect. A plugin update can clash with your theme and turn the whole site white. A hacker can change or delete your content. You can delete the wrong page by accident. Your hosting company can have a server failure. None of these are rare — they happen to small sites every day.
A backup turns a disaster into a small delay. Instead of rebuilding your site from scratch, you restore the last good copy and you are back online, often in under an hour. Without a backup, you may have to rewrite posts, re-upload images, and rebuild pages by hand — if you can do it at all.
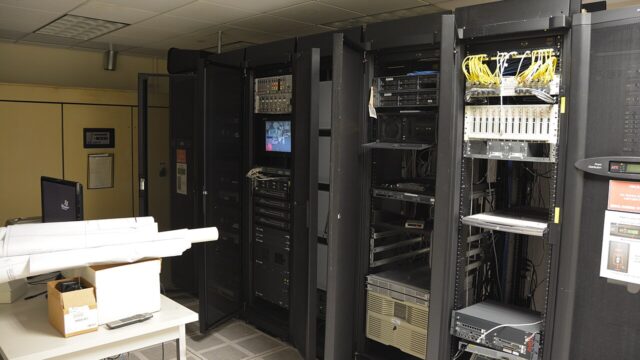
Here is the hard truth: your hosting company is not your backup plan. Many hosts do keep backups, but they may only keep them for a few days, they may only cover part of your site, and they may charge you to restore one. A backup you control, stored somewhere safe, is the only one you can count on.
Source: Wikimedia Commons
What a Full Backup Includes
A WordPress site has two parts, and a real backup must cover both. Miss one and the backup is useless.
1. Your website files
These are the files on your server:
wp-content — your themes, plugins, and every image or file you have uploaded. This is the biggest part of most backups.
wp-config.php — the small file that connects WordPress to your database. It holds your database name, username, and password.
.htaccess — a server settings file, if your host uses Apache.
The core WordPress files themselves do not need backing up — you can always download a fresh copy from WordPress.org. But everything you added or changed does.
2. Your database
The database holds all your content: posts, pages, comments, user accounts, menus, and settings. It is a MySQL database, and it is stored separately from your files. This is the part people forget most often, and it is the part you cannot rebuild from your files alone.
One thing that is not a full backup: the Export tool under Tools > Export in your WordPress dashboard. It only saves your posts, pages, and comments as an XML file. It does not save your theme, plugins, images, or settings. It is fine for moving content between sites, but it will not restore a broken site.
What a backup does not cover
Be clear about the limits. A normal WordPress backup does not include your emails, your domain name settings (DNS), your SSL certificate, or your server settings. Your host or email provider handles those separately. It also does not include files stored outside WordPress, such as images served from a CDN. Keep that in mind when you plan.
Before You Start: A Quick Checklist
Run through this list once before you make your first backup. It takes five minutes and saves trouble later.
Know your login details. You need your WordPress admin login and, for manual methods, your hosting control panel login.
Check your storage space. A backup is roughly the size of your site. If your site is 2 GB, you need 2 GB of free space wherever the backup will go.
Pick where backups will live. Decide now: Google Drive, Dropbox, your computer, or another cloud service. Never keep the only copy on the same server as your site.
Note your WordPress version. You can find it at the bottom of any admin page. It helps if you ever need to restore on a fresh install.
Do it before updates, not after. Make a fresh backup before you update WordPress, a theme, or a plugin — not when something has already gone wrong.
Method 1: Back Up With a Free Plugin (Easiest)
For most small business sites and blogs, a backup plugin is the best choice. It does the work for you, it can run on a schedule, and it can send backups to cloud storage automatically. UpdraftPlus is the most widely used free option, and the steps below use it. The free version covers everything in this guide.
Step 1: Install UpdraftPlus
In your WordPress dashboard, go to Plugins > Add New. Search for “UpdraftPlus”, click Install Now, then Activate. You will find it on the official WordPress plugin directory if you want to check it first.
Step 2: Connect remote storage
Go to Settings > UpdraftPlus Backups and open the Settings tab. Pick a remote storage option — Google Drive and Dropbox are the most common free choices — and follow the prompts to connect your account. This is the step that matters most: backups sent to cloud storage survive even if your whole hosting account fails.
Step 3: Take your first backup
Open the Backup / Restore tab and click Backup Now. Tick both boxes — “Include your database in the backup” and “Include your files in the backup” — then click Backup Now. Wait for it to finish. On a small site this takes a few minutes; on a large site with many images it can take longer.
Step 4: Set a schedule
Back in the Settings tab, set how often files and the database should be backed up, and how many backups to keep. A good starting point for a blog or small business site: files once a week, database once a day, and keep at least 3 to 5 recent backups. Save your changes, and the plugin will run on its own from now on.
Other solid free or freemium plugins work the same way — Jetpack Backup, Duplicator, and Solid Backups (formerly BackupBuddy) are all well known. The steps are nearly the same: install, connect storage, back up, schedule. Pick one and stick with it rather than running two backup plugins at once, which can slow your site down.
Method 2: Use Your Web Host’s Backup Tool
Many hosting companies offer backups as part of your plan. This is often the easiest method of all, because there is nothing to install. But the details vary a lot from host to host, so check three things before you rely on it:
How often does your host back up? Some back up daily, some weekly, some only when you ask.
How long are backups kept? A host that only keeps backups for 7 days cannot help you if you notice a problem two weeks later.
Is the backup full? Some cheaper plans only back up your files, or only your database — not both. Ask support if you are not sure.
To use it, log in to your hosting control panel and look for a section called Backup, Backups, or Jetpack Backup. Most panels let you download a backup or restore one with a few clicks. If your host charges extra for restores, or only keeps backups for a few days, use a plugin as well. Two backup systems are better than one — as long as they store copies in different places.
Method 3: Back Up by Hand With cPanel
A manual backup takes more clicks, but it costs nothing and you know exactly what you have. You need cPanel, which most shared hosts provide. It has two parts: files, then database.
Part 1: Back up your files
Log in to cPanel and open File Manager.
Go to the folder that holds your WordPress site — usually public_html.
Select all the files and folders, right-click, and choose Compress. Pick Zip Archive and confirm.
Download the zip file to your computer, then delete the zip from the server so it does not eat up your hosting space.
Part 2: Back up your database
In cPanel, open phpMyAdmin.
On the left, click the name of your WordPress database. If you are not sure which one it is, open wp-config.php in File Manager and look for the line that starts with DB_NAME.
Click the Export tab at the top, leave the format as SQL, and click Go (or Export). A .sql file will download to your computer.
Store that file with your files backup, and name both with the date, for example: mysite-backup-2026-11-13.zip.
For the database export, the Quick method with SQL format is enough for most sites. The Custom method adds options like “Add DROP TABLE”, which can help when you restore — but only change those settings if you know what they do.
Method 4: Back Up by Hand With FTP
If your host does not offer cPanel, or you prefer a direct connection, FTP works just as well for the files part. You still need phpMyAdmin (or your host’s database tool) for the database.
Install a free FTP client such as FileZilla on your computer.
Get your FTP login details from your hosting account — host name, username, and password. Use SFTP if your host offers it, as it is more secure than plain FTP.
Connect and open the folder that holds your WordPress site.
Download the whole site to a folder on your computer. This can take a while on a big site — start it and let it run.
Back up the database separately through phpMyAdmin, as in Method 3.
FTP is slower than the cPanel method because it downloads files one by one. It is a good fallback, but most people will find the plugin or cPanel route faster.
How to Restore Your WordPress Site From a Backup
A backup you cannot restore is not a backup — it is just a file taking up space. So here is how a restore works for each method.
Restore with UpdraftPlus
In your dashboard, go to Settings > UpdraftPlus Backups and scroll to Existing Backups.
Click Restore next to the backup you want. Pick what to restore — usually database, plugins, themes, and uploads — and follow the prompts.
When it finishes, check your site. Clear your cache if pages look old.
If your whole site is down and you cannot reach the dashboard, install a fresh copy of WordPress, install UpdraftPlus, connect the same cloud storage, and the plugin will find your backups and let you restore them.
Restore by hand
Upload your files backup to the server (through File Manager or FTP) and unzip it in the right folder.
In phpMyAdmin, open your database, click Import, and upload the .sql file.
If the site has moved to a new domain, update the siteurl and home values in the wp_options table to the new address.
Check the site, then clear any cache.
Restore the files first, then the database — that is the order the WordPress handbook recommends. If you restore the database first, your site may point to files that are not there yet.
How to Test That Your Backup Actually Works
Most people never test a backup until the day they need it. That is the worst time to find out it is broken. Test yours twice a year with this short checklist:
Check the file size. A backup that is far smaller than your site is a warning sign. Compare it with your last good backup.
Open the zip. Make sure it contains wp-content, wp-config.php, and the .sql database file. If anything is missing, the backup is incomplete.
Restore on a staging site. This is the real test. Many hosts offer a one-click staging site. Restore the backup there and click through your pages, check images load, and log in to the dashboard. If the staging copy works, the backup works.
Check the database import. If you test a manual restore, watch for errors during the .sql import. A failed import usually means a corrupt or partial file.
Write down what worked. Keep a short note of the steps and how long the restore took. In a real emergency, you will be stressed — a note saves time.
If a test restore fails, do not wait. Make a new backup right away with a different method, and check whether your site is too large for the tool you are using — very large sites sometimes need incremental backups, which save only what has changed since the last backup.
How Often Should You Back Up?
There is no single right answer. It depends on how often your site changes. Use this table as a starting point:
Site type
Database
Files
Static site or portfolio (rarely changes)
Weekly
Monthly
Blog or small business site (a few posts a month)
Daily
Weekly
Active blog or news site (daily posts and comments)
Daily
Daily
Online store (WooCommerce) or membership site
Real-time or hourly
Daily
Notice that the database is backed up more often than the files. Your posts, orders, and comments change every day, while your theme and plugins only change when you update them. A backup plugin lets you set different schedules for each — use that.
And whatever your schedule is, always take a fresh backup right before you update WordPress, a theme, or a plugin, and before any big change such as a redesign or a move to a new host. Updates are the most common moment for things to break.
Where to Store Your Backups: The 3-2-1 Rule
The 3-2-1 rule is simple: keep 3 copies of your data, on 2 different types of storage, with 1 copy off-site. For a WordPress site, that could look like this:
Copy 1: your live site (on your host’s server).
Copy 2: a backup in cloud storage, such as Google Drive or Dropbox.
Copy 3: a backup on an external hard drive or a second cloud service.
Here is how the common storage options compare for a small site:
Storage
Cost
Good for
Watch out for
Google Drive
15 GB free
Small blogs, automatic plugin backups
Free space fills up fast on image-heavy sites
Dropbox
2 GB free
Small sites, simple setup
Small free limit; paid plans start around $10/month
Amazon S3
Pay for what you use
Larger sites, long-term storage
Setup is more technical; costs grow with size
External hard drive
One-time cost
A second copy you control
Can fail or be lost; keep it away from your computer
Your hosting account
Included
Quick restores
Useless if the server itself fails — never your only copy
Two more habits help. First, keep old backups for a while instead of overwriting the only good copy — keep at least 3 to 5 recent ones, so a bad backup does not replace a good one. Second, protect your backup files: they contain your whole site, including passwords in wp-config.php, so do not share the download links and use a storage account with a strong password and two-factor authentication.
7 Common WordPress Backup Mistakes
Backing up files but not the database. Without the database, you have a theme and images but no content. Always back up both.
Keeping the only backup on the same server. If the server fails or the account is hacked, your backup goes with it. Send a copy off-site.
Never testing a restore. A backup that has never been tested is a guess. Test it on a staging site twice a year.
Trusting the Export tool. Tools > Export saves content only. It is not a backup and will not restore a broken site.
Backing up after the update, not before. The backup you need is the one from before things broke. Make it first.
Assuming your host’s backups are enough. Check how often your host backs up, how long copies are kept, and whether the backup is full. Many hosts only keep backups for a few days.
Overwriting your only good copy. If a backup runs while the site is already broken, it can save the broken version over the good one. Keep several recent backups, not just one.
Frequently Asked Questions
How do I back up my WordPress site for free?
Use a free plugin such as UpdraftPlus and send the backups to the free tier of Google Drive or Dropbox. The plugin is free, the storage is free up to its limit, and the whole setup takes about 15 minutes. Manual backups with cPanel and phpMyAdmin are also free.
Does WordPress have a built-in backup feature?
No. Self-hosted WordPress has no built-in full backup tool. The Export feature under Tools > Export only saves your posts, pages, and comments. For a full backup you need a plugin, your host’s tool, or a manual backup.
How do I back up my WordPress site without a plugin?
Use your host’s backup tool, or do it by hand: compress your site files through cPanel File Manager (or download them with FTP), then export the database through phpMyAdmin. You need both parts for a full backup.
How do I back up my WordPress site to my computer?
Any of the four methods above ends with a file on your computer: download the backup from your plugin’s storage, from your host, or from cPanel/FTP. Store it in a clearly named folder with the date, and keep a second copy somewhere else, such as cloud storage.
What is the best WordPress backup plugin?
For most small sites, UpdraftPlus is the safest pick: it is free, widely used, and supports scheduled backups to Google Drive, Dropbox, and Amazon S3. Jetpack Backup and Duplicator are also solid choices. The best plugin is the one you actually set up and test — an untested backup from a great plugin is worth less than a tested one from a simple plugin.
What is the 3-2-1 rule for backups?
Keep 3 copies of your data, on 2 different types of storage, with 1 copy off-site. For a WordPress site, that usually means your live site, a copy in cloud storage, and a copy on an external drive or a second cloud service.
How do I back up my WordPress site before an update?
Take a fresh backup right before you click Update — with your plugin’s Backup Now button, or by hand with cPanel. Check that the backup finished and the file size looks right. Then run the update. If anything breaks, restore the backup you just made.
Does this guide apply to WordPress.com sites?
Not directly. This guide is for self-hosted WordPress.org sites, where you control the files and database. On WordPress.com, backups are built into the Business and Commerce plans (through Jetpack Backup), and free, Personal, and Premium plans do not include downloadable backups. If you are on WordPress.com, check your plan’s backup options in your dashboard.
Final Thoughts
A WordPress backup is cheap insurance. It costs nothing to set up with a free plugin, it takes about 15 minutes the first time, and it runs on its own after that. The work is not in making the backup — it is in making sure the backup is complete, stored off-site, and tested. Set it up today, test the restore on a staging site, and you will never have to rebuild your site from nothing.
For the official, more technical version of this topic, the WordPress developer handbook has a detailed guide to WordPress backups that covers database exports and restore order in depth.
Taylor Orlando is a content writer at Meregate covering websites, SEO, and AI. Taylor breaks down complex topics into simple, practical guides that help small businesses build better websites, rank higher on Google, and get real value from AI tools — no jargon, no fluff.
Moving a WordPress site to a new host sounds risky, but done in the right order it causes no downtime at all. This guide covers the free plugin method, your host's free migration service, and the manual method — plus the checks to run after the move.
Chrome shows ERR_CONNECTION_TIMED_OUT when a website never answers in time. This guide shows how to find the cause in 30 seconds and fix it step by step.
Learn how to design a website using AI — pick a builder, write a good prompt, fix the first draft, and launch. Costs, prompts, and a launch checklist included.